Sunday, 14 July 2013

Peg Bag Part 3

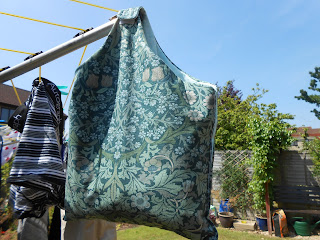
I got my sewing machine fixed :) So I finished sewing the peg bag. Here it is:

First, make sure the outside's facing, sew along the top straight sides.

 Then turn it the right way around so the stitching is facing inside.
 Cut an appropriate size of Velcro.
Sew the tougher side of Velcro onto the inside of the longer handle piece.
 Sew the fluffier Velcro onto the outside of the smaller handle piece.
 They should attach like this:
 Your final product should look like this:
 Well done and thank you for using this guide. I hope you enjoyed the process and that your Peg Bag is being a good item for you.

There are a few things you could change to make the bag unique to your own style.
This is a Peg Bag I made earlier:
 When sewing down the sides I sewed with the wrong sides together meaning you can see the stitching.

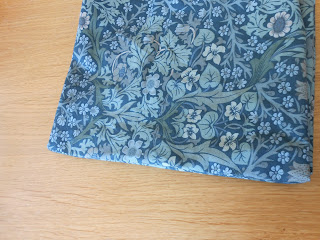
 I also used a different material for the inside. I used a light blue with white a pattern as my outside material is made of very dark colours.
 Doesn't it work well? : )


Tuesday, 9 July 2013

Notebook cover Part 1

In this second how to, I'm going to show you how to make a notebook cover (it should also work on books) . It's a great item to use yourself to protect your favorite books or to give as a present to a good friend.

With this cover you need to use your own measurements as different books are different sizes. I will give you the basic pieces you need to cut out and what size i made them and why.

First you need three of the same size rectangles. I have chosen a red themed cover with two different material patterns, you may decide to only use one material or maybe three different ones. When using two I would suggest having two of pattern one and one of pattern two rectangles.

My rectangles are 22.5 cm in height and 15 cm in width. I measured my book and added 2 cm to the height and to the width.
 You then need two thinner strips. One in pattern one and the other in pattern 2. They should be the same height as the rectangles but only 4 cm wide.
 You also need four wider rectangles. Again, keep them the same height. I have chosen to use them all in pattern two but you could have two in pattern one if you wanted.They should have a width of 8 cm.
 You then need two pieces, one in pattern one and one in pattern two. They need to be the same width as the first rectangles. the top piece should be about 10.5 cm and the lower piece should be 16 cm.
 this is the layout of the front.
 this is the layout of the inside.
All pieces need to be lined with interfacing. Simply cut out the same size pieces and iron them on.

peg bag part 2

For the second part I will show how to sew the three pieces together.

First you need to place the two half pieces together with right sides facing (the pattern side)


Then tack and sew along the right side of the two pieces.

 Then remove the pins so you are left with just the thread and trace a chalk line 0.5 cm from the edge.


 Then sew along the line at both ends leaving a space of about five cm in the middle. Remember to sew backwards to add strength.


 Then place the two pieces you have just sewn and the large piece together, right sides facing.
 Sew around the edge going as close to the edge as you can.

 Trim any excess material.
 Then pull the material so the pattern is facing out. Pull it through the hole you left between the two first pieces.
 It should end up looking like this:
 Fold the pieces together so the gap is at the bottom of the bag.
 You then need to sew across the hole making sure the edge of the material is on the inside of the bag.

In part 3 I will show you how to make it a complete bag. Unfortunately my sewing machine started acting up so I was unable to finish it today.

Thursday, 27 June 2013

Peg Bag Part 1

For my first how to make I will show you how to make a Peg Bag for holding garden pegs. It can also be used to hold a variety of objects.

First you need a large piece of material, patterned with your liking.
Lay it out on a flat surface, like so:


Trace out a rectangle of 43 cm by 28 cm:


Use tailors chalk and a ruler for accurate lines.


Make a small line of 3 cm, 21 cm away from the middle of the right side of the rectangle, 12.5 cm from the bottom of the rectangle.


Then, connect the bottom of the rectangle to the bottom of the line and the top of the rectangle to the top of the line. Make sure they are smooth curves:


Do the same on the other side but make sure it is 1 cm smaller than the other sides.


Next, cut the shape out.


Put this piece to the side so you can cut out the inside.


For the inside you need two identical pieces. The easiest way to do this is to fold the material in half.


Draw a rectangle of 29 cm by 23 cm.

 Mark a line of 4 cm, 21 cm away from the side of the rectangle.


Join the line to the rectangle in two strong curves.

 Now you just need to cut it out. You should end up with two separate shapes.


I will show you how to sew the bag in part 2. See you then.

Edit: You can use a different material for the inside to make it more your style. This can be the same pattern in a different colour or a different pattern in the same sort of colour. If you are really out there than you can use two completely different types of materials.


Thursday, 20 June 2013

Intro

This blog is going to be a mixture of how to sew (Make certain things) and what I have made.

Here is some examples that I will go into further in my next post:


Theses are some Kindle covers that I have recently made. I used a Simplicity Paper Pattern.