I find that my DS is always getting scratched and dropped so I decided to make a cover that I can carry it around in. I also find that I can only take one game with me wherever I go so I have included a pocket in which games can be carried.
You can change the dimensions in order to make it work with any DS, DSI, 3DS or gameboy. I have used dimensions for a DS Lite.
I have used two different fabrics with a base colour scheme of orange/yellow, you can use more or less than I have.
First you need 3 pieces of 11 cm by 17 cm. Two should be in fabric one (1) and one in fabric two (2).
You also need two pieces of size 7.5 cm by 17 cm. One should be in fabric one (3) and the other should be in fabric two (4).
You then need two triangles, base length 12 cm and point height as 6.5 cm. One in fabric one (5) and one in fabric two (6).
You also need a piece of 3.5 cm by 17 cm in fabric two (7)
Another two pieces you need are both in fabric one. One is 13 cm by 17.5 cm (8) the other is 16.5 cm by 17.5 cm (9)
The last piece you need is the only one you don't need interfacing on. it should be 10.5 cm by 16 cm and in fabric two (10).
So all but (10) needs the same size piece of iron on interfacing on the back.
First you need to fold piece (9) in half.
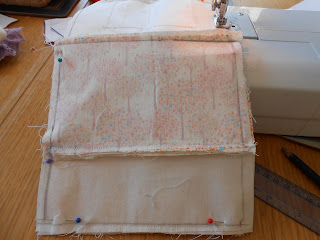
Then place it on piece (2), make sure the open end is on the bottom, then pin the piece on.
You only need to sew along the bottom but you may want to secure the sides as well. If so, sew them as well.
Then attach piece (3) onto the end that you have just sewn. Sew along the one side you have attached.
Attach piece (8) to the other end of piece (2). Sew along the attached side.
Fold over piece (10).
Sew down both sides leaving the end open.
Pull through the gap so it is the right way around.
Pin the open edge onto piece (8) about 1.5 cm up. Then sew it along the one edge.
Fold it upwards so the edge you have just sewn is under the fabric now.
Sew along the two edges.
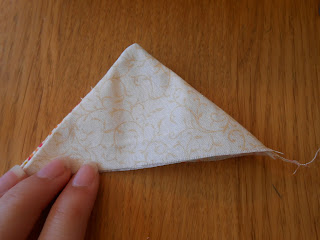
Attach the two triangles so the pattern is facing inside. Sew from the edge to the point on both sides leaving the base edge open.
Pull it through the hole so the pattern is now facing outwards.
Cut a piece of Velcro so it fits onto the triangle. Sew it on in the middle of the triangle on the side of fabric one.
Attach the triangle onto the edge of piece (3). Make sure pattern one is facing inside.
That's the inside sewn, now for the outside.
Sew piece (7) onto one of piece (1). Make sure the pattern is facing inwards.
Sew the other piece (1) onto the other side of piece (7).
Sew piece (3) onto the edge of piece (7).
Sew the other piece of Velcro onto the middle of piece (1). Make sure it is lined up to the Velcro on the triangle.
Now attach the front and back together with pattern sides facing together. Leave the end, that doesn't have the triangle, open. Fold the edge over by 1 cm on both sides.
Cut the corners of the edge sewn up so the triangles are pointy.
Pull it all through the gap.
Finally sew along the edge that was left open.
Now it is finished you can place your DS in it.
The pocket is perfect for carrying Gamboy or DS games.
The Velcro will help keep it closed and safe.
It fits perfectly! Wooooo. :)
Thank you for reading my instruction. I hope this pattern will help with you or your child's packing. Remember, have fun.
If you would like to buy this case please place an order here: https://www.etsy.com/uk/listing/157913925/ds-lite-case
Saturday, 27 July 2013
Monday, 15 July 2013
Notebook cover Part 2
Both pieces number 2 are the same so it does not matter which one is used when you need them.
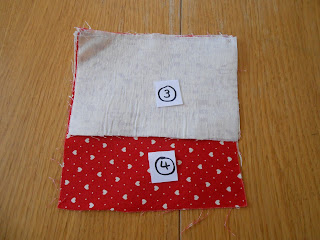
3 and 4:
5 and 6:
All four are the same so they are all seven:
First you need to put 3 and 4 together with right sides together. Then sew along the top edge.
Now place two sevens with right sides together.
Sew along three sides. Leave one of the smaller lengths unsewn.
Then pull it the right side out through the gap in the bottom. Do this with the other two pieces of seven.
Place five onto one with right sides facing. Sew along the very right edge.
Then sew 3 and 4 onto 5.
Pin a seven onto the left side of a two. Make sure you leave a gap of 1 cm between the edge of the material and where you're going to sew it.
Then turn seven onto 2 and pin the top and bottom into place. You can just tack it into place or if you want to make sure it stays in place simply sew it.
Sew six onto the edge of two. Sew the other seven onto the other two and then sew it onto six.
Place the front and back together with right sides facing inwards. Make sure you fold one edge down and leave it open.
Pull it through the hole so it is the right way out.
Once you've sewn the hole closed, iron it smooth.
You can then put a book inside the cover.
I hope you enjoyed making this item and that it comes to good use. Please comment on what you think and if you have any ideas of what i should make next.
Note 1: I only realized the heart pattern was in a certain direction when I'd finished. I'd thought it had been in a random pattern. Therefor when you are making yours make sure all the patterns are in one direction.
Subscribe to:
Comments (Atom)


